Smooth Tile to Wood Floor Transitions for a Beautiful Finish
Both tiling and hardwood flooring are incomparable material choices when it comes to your home’s interior design.
Each lends a specific look and feel that elevate your home to previously unimagined standards, but the question still stands: How to marry tile to wood, where one ends and the other begins? How do you make that transition look fluid and effortless rather than abrupt or unfinished looking?
Transition markers are intended to stand alone in their own right and can be of either wood or tile, as well as a number of other flooring options. The important thing is that they carry their own unique form that does not mimic the layout of either side. From geometric tiling designs to simple inlaid wooden strips, there are a number of ways to define these tile to wood ideas without missing a step. This is your chance to get creative and choose from an assortment of materials and colors that will truly pop.
Tile to hardwood transitioning may not be at the top of your to-do list yet, but you’ll be amazed at the transformative power of such a simple detail. Without even realizing it, guests will marvel all the more at the space you’ve created while you’ll look forward to crossing each threshold every time.

Metal transition strips do a great job of breaking up two different materials while adding a classy accent. There are several styles of transition strips made in different finishes. They can serve as a border where a or backsplash ends, or they can make an unattractive transition into a feature in the room.
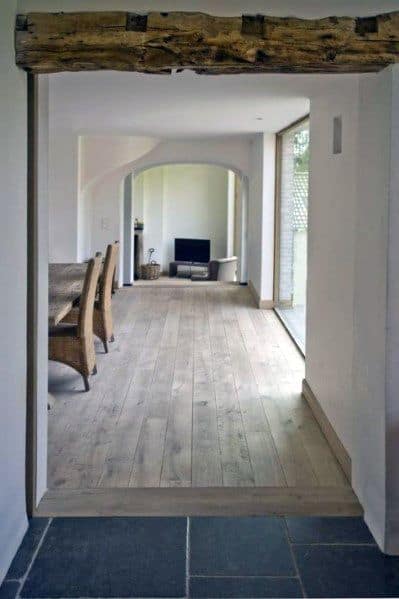
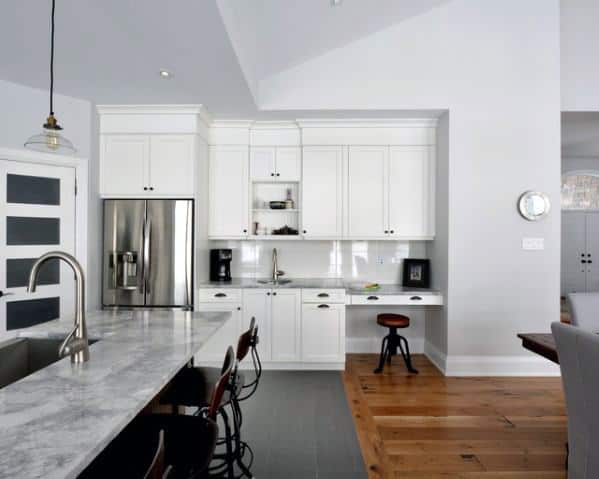
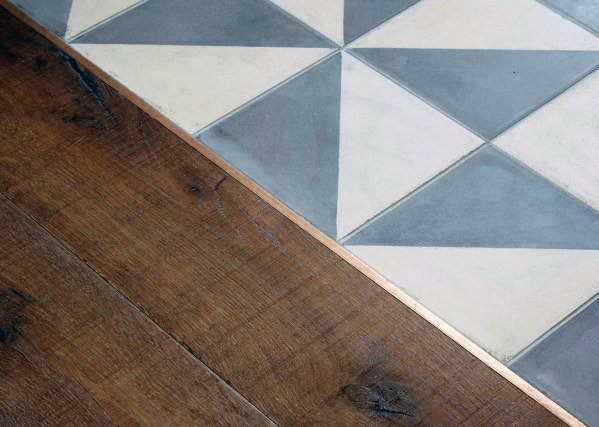
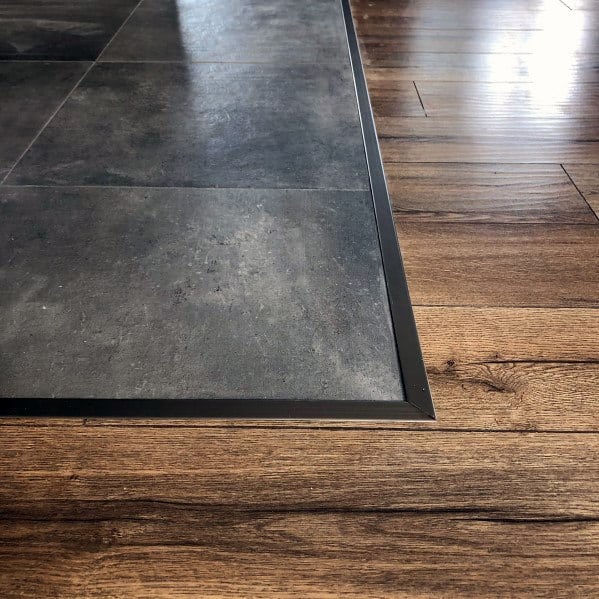
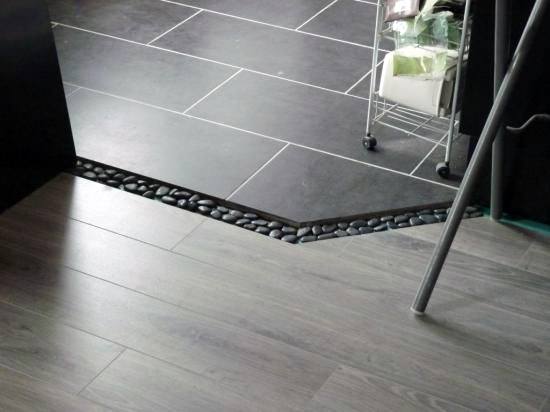
This transition does a nice job of breaking up dark-stained from the large, concrete-look tiles. Use this transition between mudrooms or kitchens and living spaces.

inlays are a great way to change the tone of a room. They bring different textures and colors into a room that otherwise would require an area rug to break things up.
This inlay sits nicely inside its frame. This would be a great addition in front of a home’s main entryway in place of an area rug. It will cover the same styling cues you’re looking for while being lower maintenance. is much easier to clean than an area rug, so if the conditions should be wet, you’ll have nothing to worry about.
These large, square tiles keep this entryway bright and attractive while being low maintenance. They frame the in the living area nicely without a complicated border or transition piece.
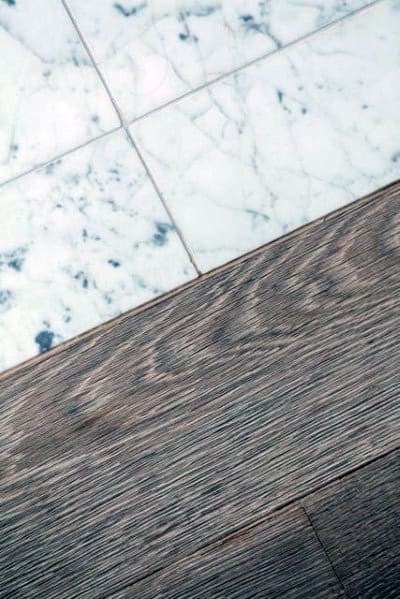
The long, sharp lines between two different materials are a challenge. The key to making this look work is precision. It’s easier to install a precise than it is to install large tiles. You can use spacers to be reasonably accurate, but anything that has to be adhered in place is likely to move a little before it dries. Install the wood floor first, then the around it.
This transition probably looks more intimidating and complicated to achieve than it actually is. When the space is this small, you can achieve this look by slowing down and taking it one at a time.
An oscillating tool is a must-have for a project like this. It will help make accurate, straight cuts on the . Once you’ve laid the main field of , mark the using a as a guide. Make sure to keep the line in mind when you mark around your guide tile. Then use the oscillating tool with a blade to make sharp, accurate cuts on the , taking your time to achieve a professional look.


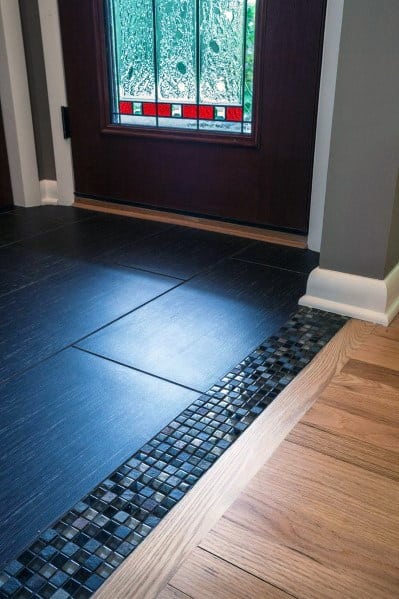
The glass can be used as an excellent border that separates one from another. The mosaic border will get visitors’ attention, making it a style accent instead of an eye-offending transition.
This look is rather simple to achieve. If your already has a piece capping its ends, remove it. Once the main field of is laid, create the border around it with the glass at a width that appeals to you. Now measure the gap between the and mosaic edges. You can cut the original end-cap board on a table saw to fit the space or buy a new one if it’s not large enough.

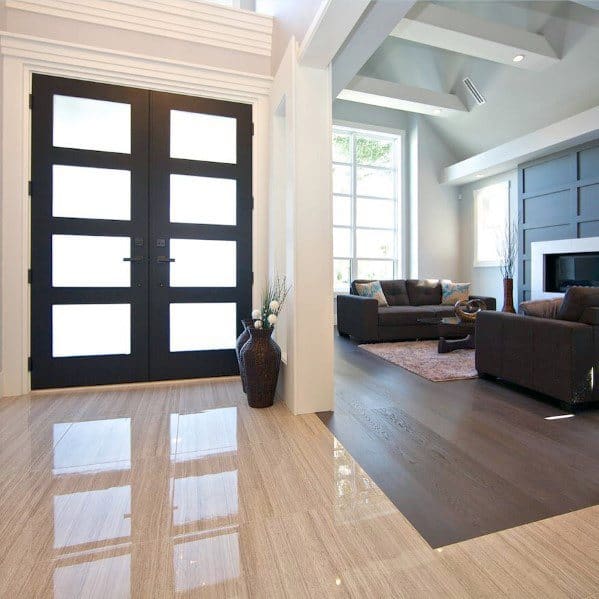
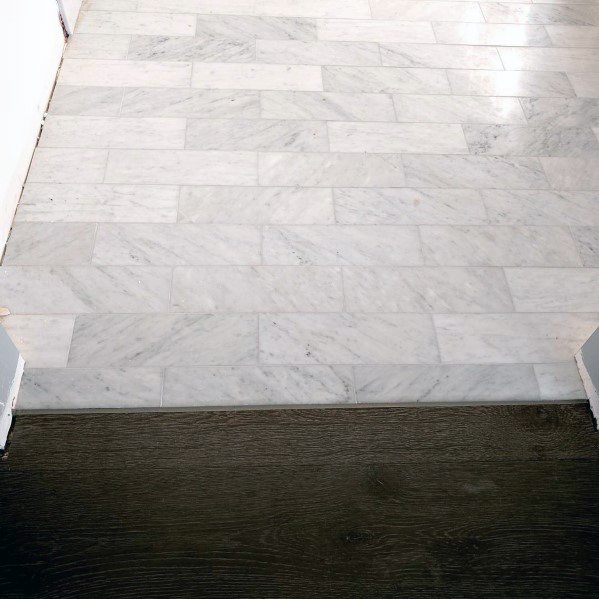
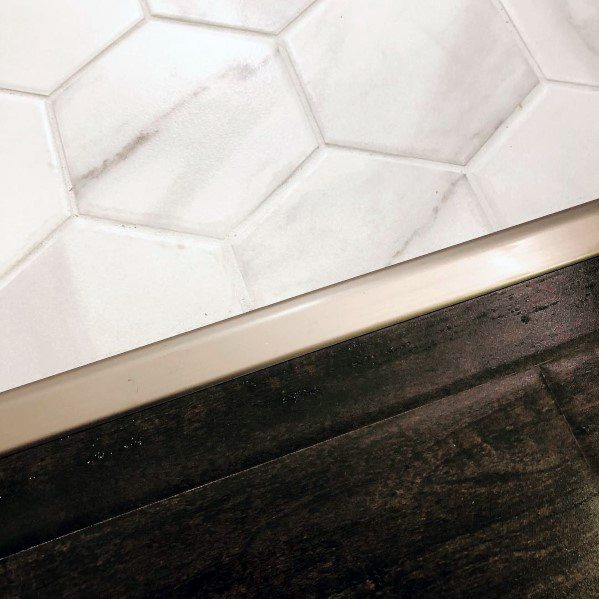
If your ‘s end cap is large enough, it can serve as its own transition between materials. Here, the large slate tiles run right up to the end-cap, which also serves as a threshold between the spaces.
This is an excellent style choice for an uneven transition. The slate doesn’t meet with the wide-plank on the same plane. The end-cap and transition combination has an eased edge that tapers from the to the . This makes a comfortable and attractive way to transition between the two rooms without stumbling over uneven edges.
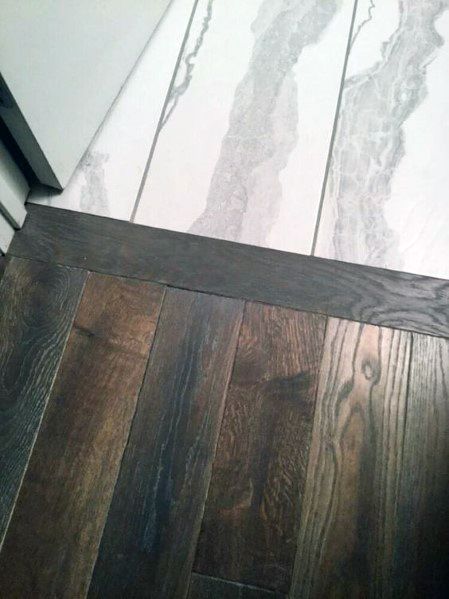
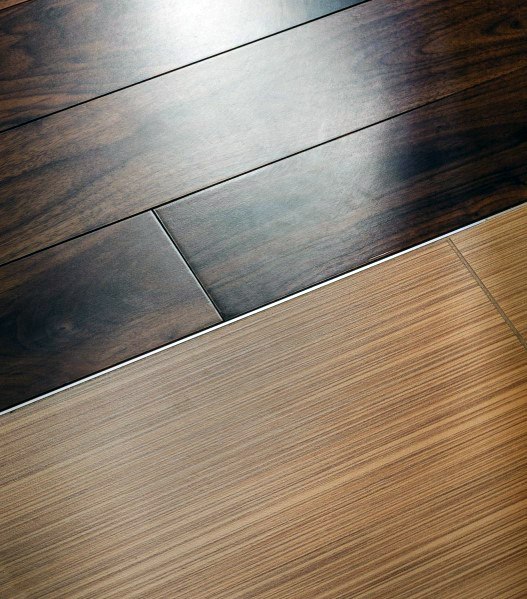
We really like this dark to light transition in this doorway. The is butted right up to the end cap, making any transition strips or T-track unnecessary.
The direction that the planks and tiles are laid makes this transition option even more attractive. Both the and are run lengthwise through the rooms, only broken up by the end cap. The end cap blends in without being distracting. This will give the two rooms some continuity regardless of the change in .
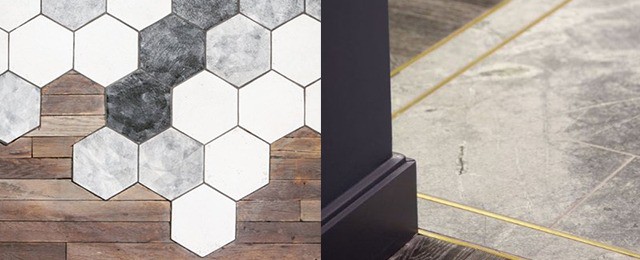
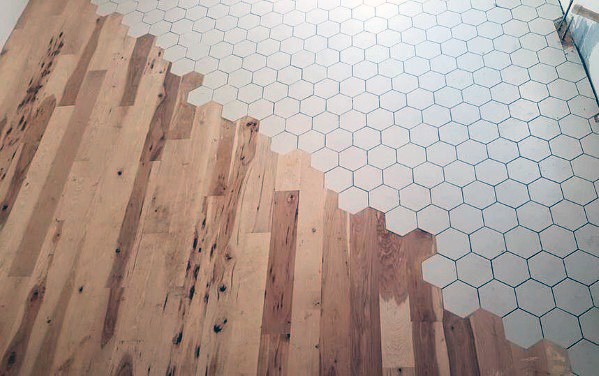
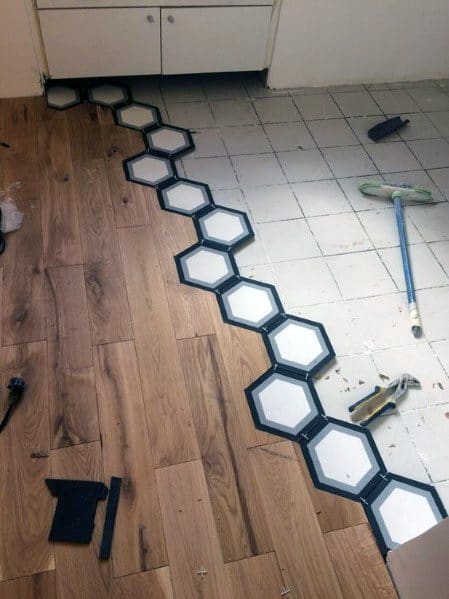
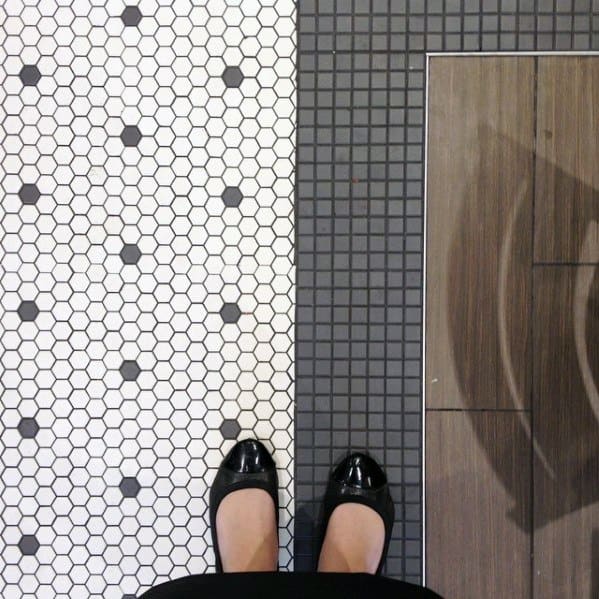
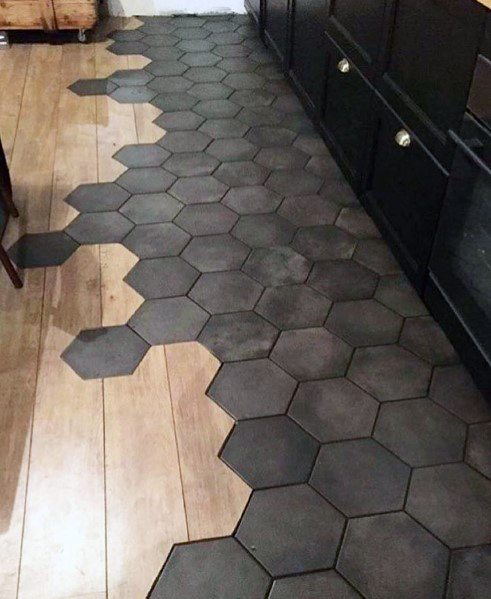
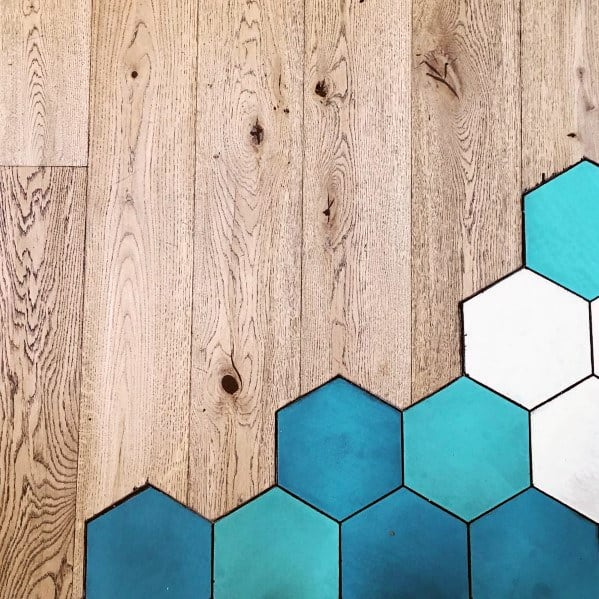
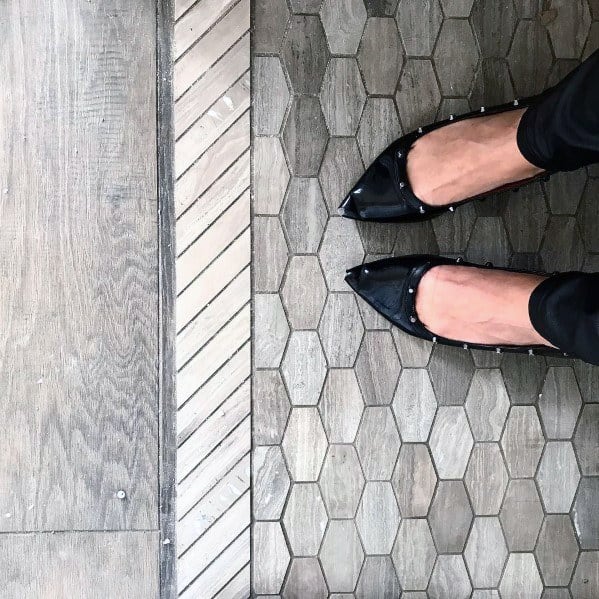
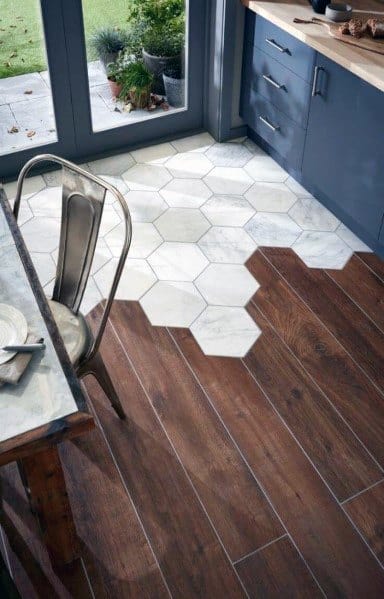
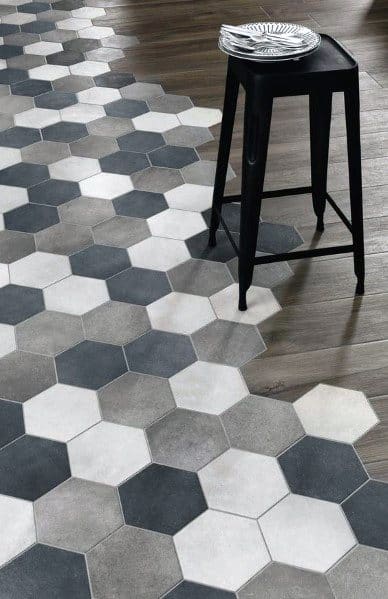
The simplest solutions are often the best solutions, so don’t count out the old school when considering . While these slate, hexagonal tiles might seem new, the method by which they meet the is not.
The end cap does a very nice job of framing the while also meeting the cleanly. The look is finished off with a sharp, consistent line to create a classic finish without the use of fancy moldings or borders. A look like this would work perfectly where a hallway meets a mudroom or kitchen.

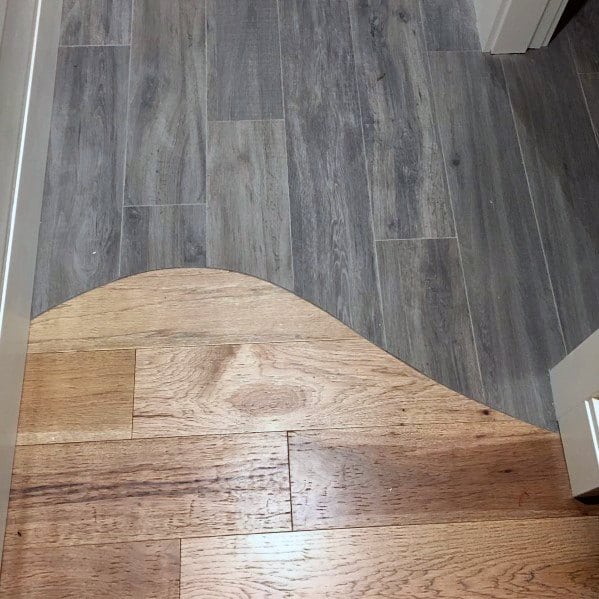
Why break up colors when you can blend them together? Starting with one solid color and ending with another doesn’t mean there has to be an abrupt change. Mixing colors and styles between the two is a fun way to achieve the same end result.
There are some important things to remember when trying to pull this look off. You shouldn’t attempt to lay the two solid fields and meet in the middle. This will end either in uneven gaps or the necessity of a transition strip, defeating the purpose entirely. Work slowly, and lay tiles out ahead of time so you can tweak your design. Take a few pictures of each pattern that you lay out so you know which you’d prefer before you start the transition.
Unsure how to make the transition from a two-tone to a solid, ? This metal transition strip will do the trick nicely.
These strips are available at any home improvement store near their section. They’re designed to be installed in place and either worked from or tiled up to. They provide a nice, straight line with a shiny profile between two edges of the . They can also be found in matte or flat finish if the polished look doesn’t appeal to you.
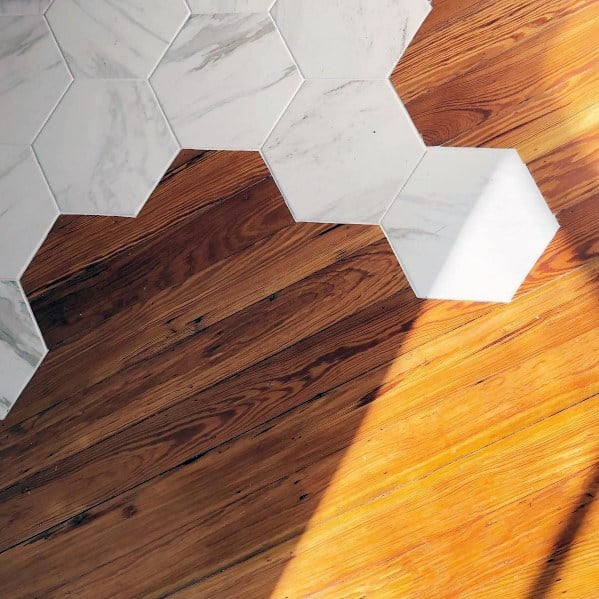
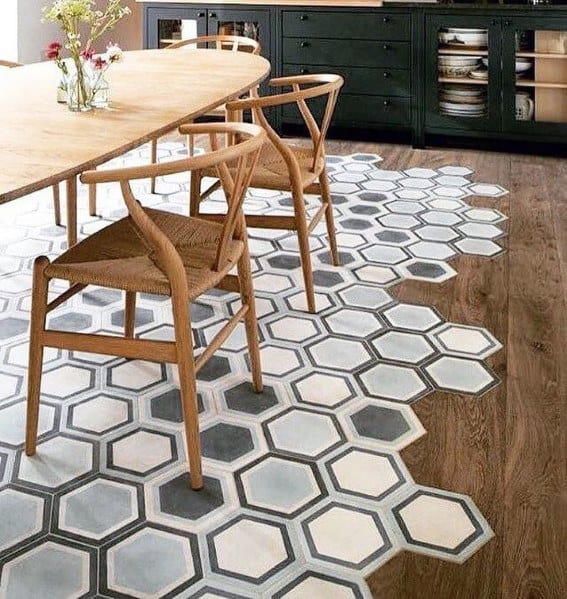
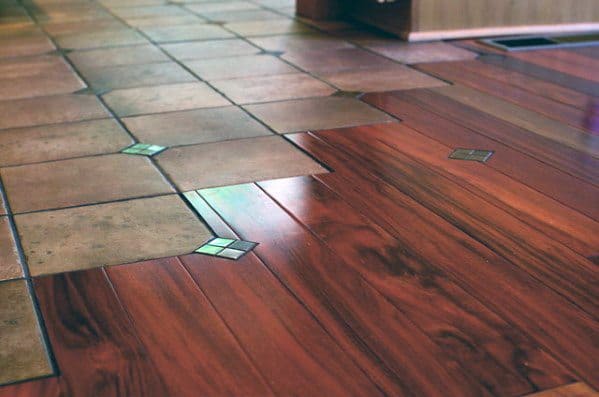
Give your dining room a coffee-shop style by using to ideas like the one pictured here. By having your non-traditional tiles flow into the , you’ll be allowing the spaces to meet naturally without sharp designations.
If you take this project one step at a time and treat each as an individual inlay, you should be able to achieve this look without much issue. Lay the majority of your tiles up to the , then cut out space for each individually, taking care to make sharp, straight cuts with clean corners.

This unique transition between rooms can be achieved anywhere two styles of meet. It’s especially useful when a wide, wooden threshold would be unwanted.
If you’re retrofitting this transition after the two have already been installed, it’s worth taking the time to ensure you have two straight, square edges to work with. The metal transition strips can only do so much to give an even appearance. A circular saw fitted with a -blade can be dragged along a straight-edge to give you the best, but dusty, results.
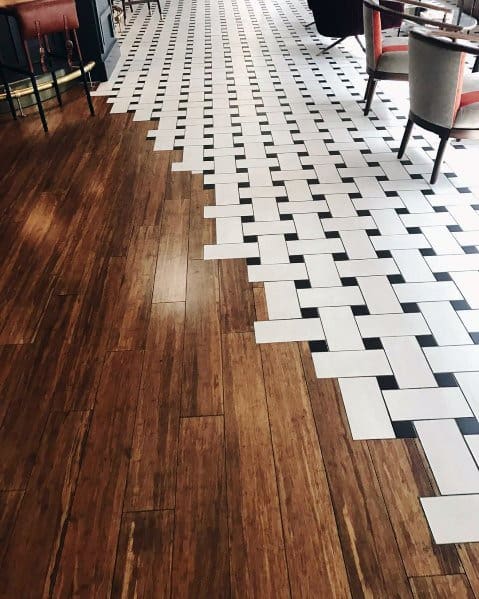
Letting and run into each other like in the picture below is a great way to blend two spaces and create some cohesion.
While this is a modern take on -to-ideas, it’s interesting and can be used in a variety of spaces. We think an approach like the one above would be great in a modern ski-lodge style home around a woodstove or in an entryway. You’ll have style while still protecting your from the elements and abuse.
This older factory has benefited from a new, bright to modernize the space. The two materials look great together and the rustic factory doesn’t beg for perfect craftsmanship.
floors like this have already seen their share of abuse. You can blend your tiled space into the without worrying too much about achieving the optimal fit. In some scenarios, perfection will look out of place. Just do your best to make it work without stressing over each small mistake. They’ll end up blending in with the other blemishes in the and adding character.


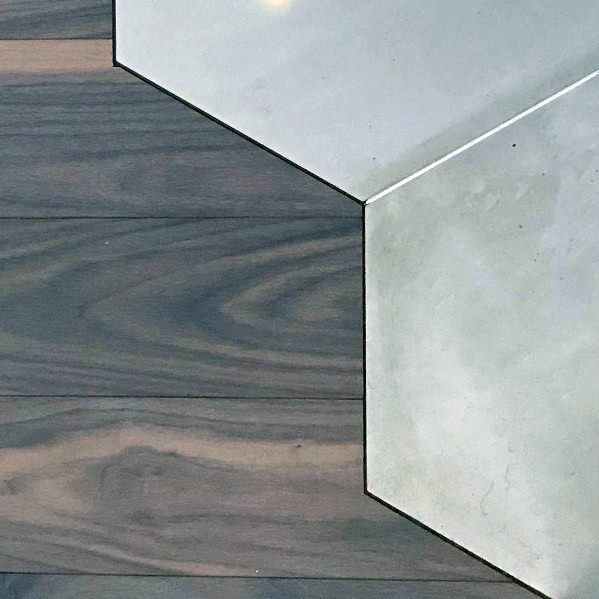
No one ever said that your to transition had to be where two spaces meet. This transition idea is a unique way to make the floors work together to make two rooms out of one.
If you’ve got one space that serves two purposes and you want to designate the two areas, a transition can be an excellent addition. The pine in the eating area meets the kitchen tiles nicely with the use of an end cap board. This gives the allusion that the two are separate spaces without barriers or walls.
If you’re looking for a simple yet attractive way to transition from to without fuss or difficulty, you can look to this doorway for inspiration.
Transitions between types don’t have to be made with large moldings, metal strips that might look out of place, or complicated mosaic borders. You can achieve the desired result with less pomp and circumstance with a thin strip of . Stain it to match the , then glue and nail it down to cover any gaps between the two rooms.

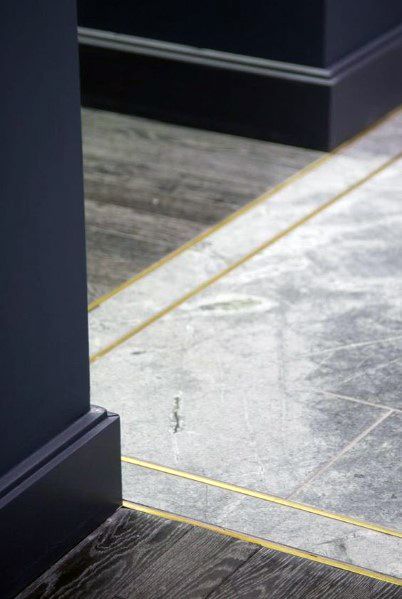
This embedded metal strip does a nice job of splitting the two surfaces without drawing too much attention to itself. It becomes a classy touch instead of a major feature.
A transition style like this would make a good choice in a traditional style home where a kitchen meets a living space. The brass finish will blend with a lot of the other and features while still allowing the to be the main focus of the space.
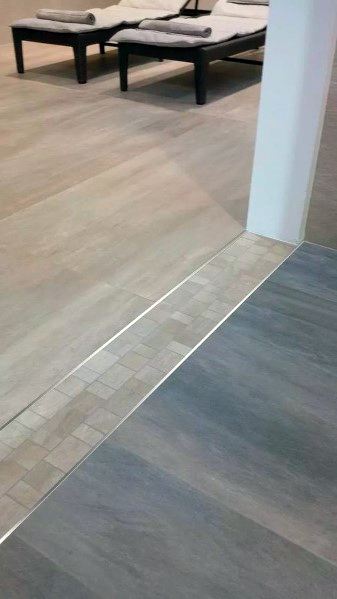
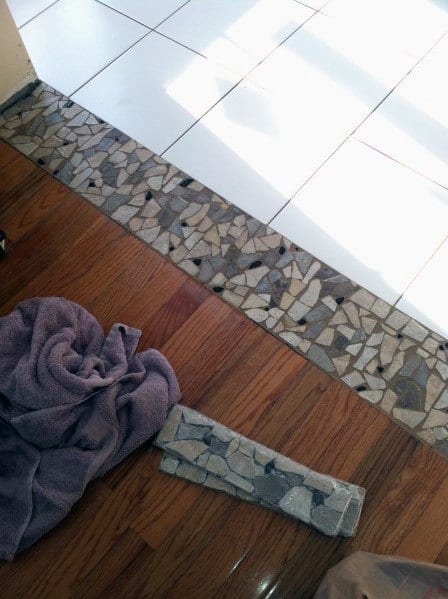
This threshold is an interesting way to make the transition from the to the . These premade tiles are perfect for cutting and fitting between surfaces.
One thing you’ll want to keep an eye out for is choosing a complementing color. Take inventory of all the colors involved between the , premade stone tiles, and the . Choose a color that complements them all to create some continuity between the three surfaces.
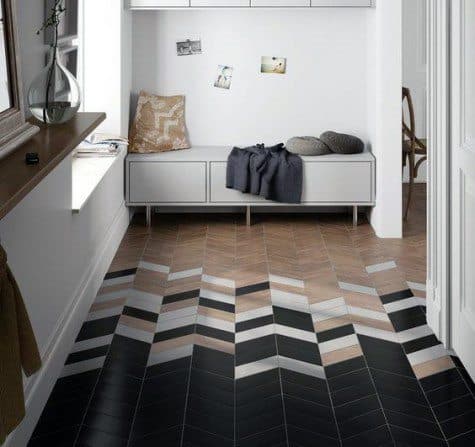
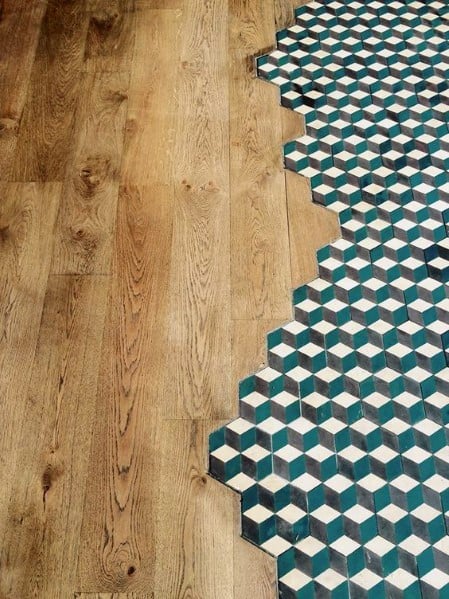
Two different patterns can be difficult to find a transition that will work for both. Often whatever you choose ends up leaning to one pattern or the other, making the transition look like an afterthought.
Embrace that afterthought idea and choose a transition with a completely different pattern than either surface. These diagonal tiles bridge the gap between both surfaces without blending in to either side. Ideas like this are ideal to frame a room or create designated, activity-specific spaces like kitchens and dining rooms.
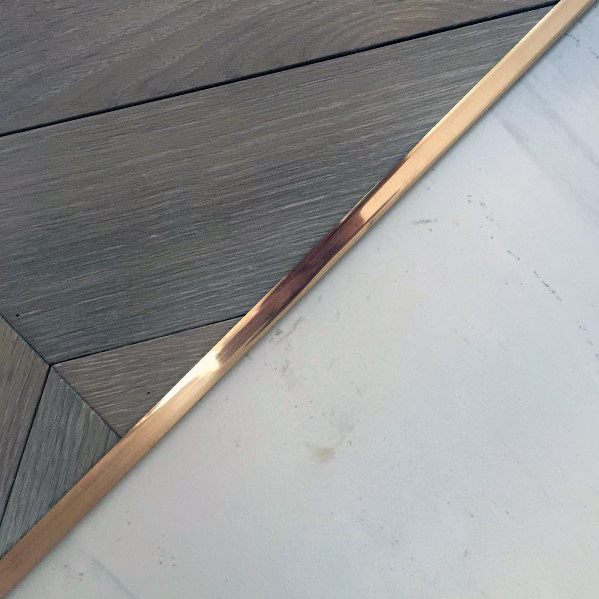
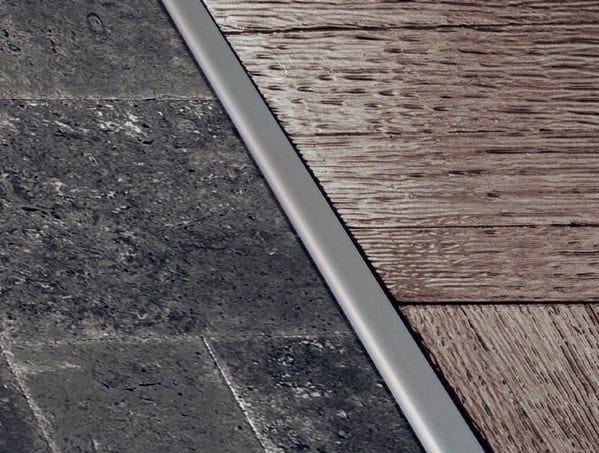
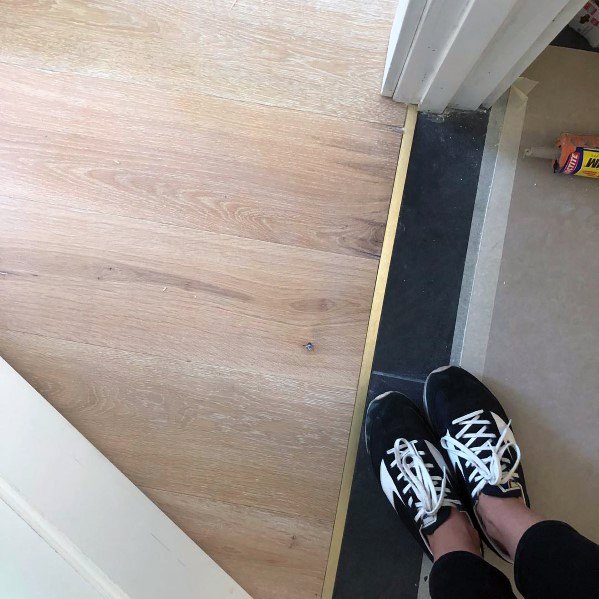
This -to- transition is accomplished with the help of a small, thin metal transition strip. The brushed aluminum finish blends in nicely to accent both choices.
Use a strip like this to break up spaces without drawing attention to the transition. This style is better served for use between two rooms than around a inlay that might require a more prominent border to frame it attractively.
This is a good example of T-track transitions between services. These are popular for use in retrofit scenarios and engineered installations. They overlap each surface to cover any gaps and provide a consistent look.
When you purchase T-track moldings, you’ll notice they come with metal strips and screws. This strip is placed between the two surfaces and screwed to the subfloor. The molding then snaps down into the metal track, overlapping the two surfaces for a finished look. They’re great for floors that might move with moisture.

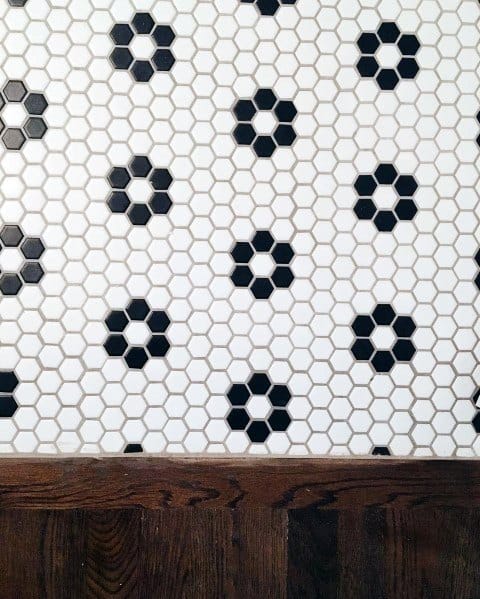
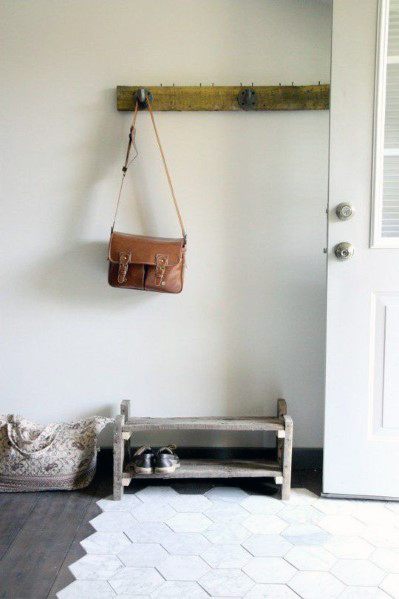
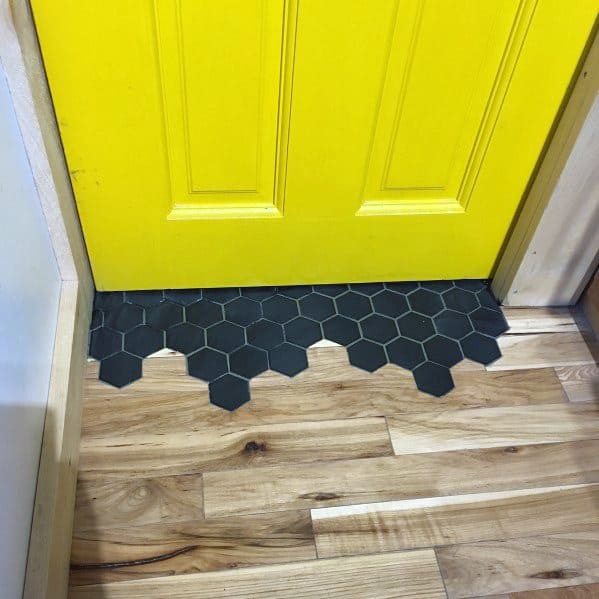
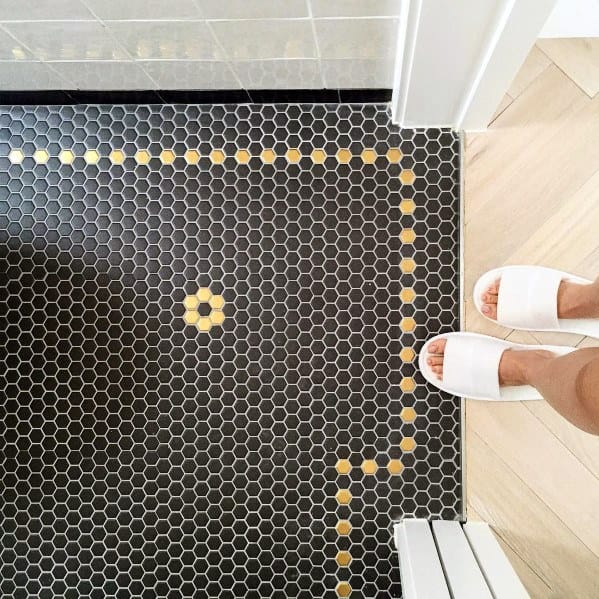
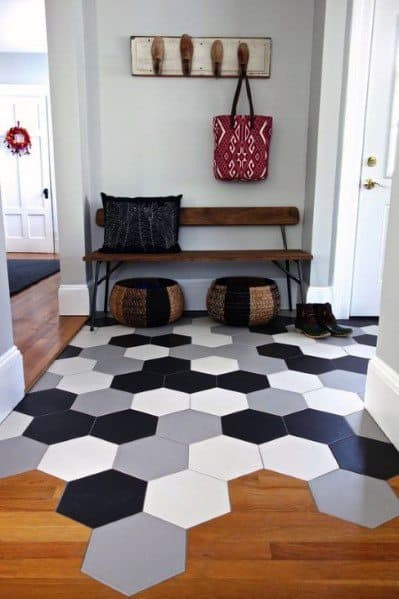
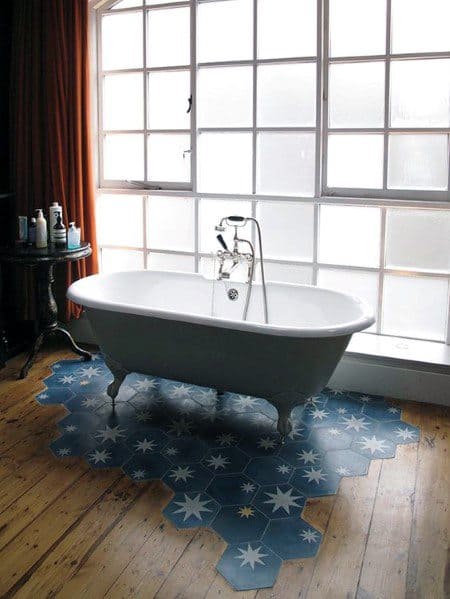
There’s no better for a mudroom entry than . is easy to clean and difficult to damage. The issue can be making it work with the rest of your .
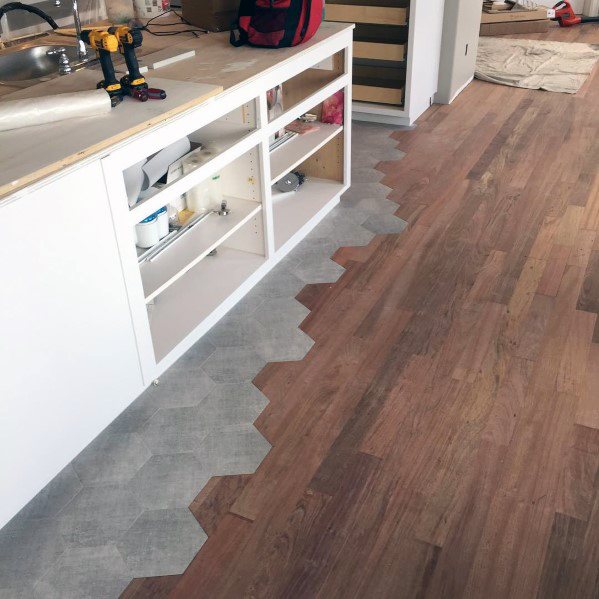
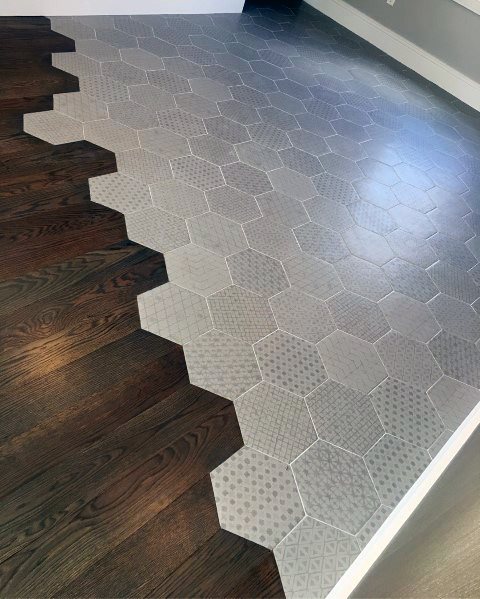
This home’s transition from to adds a touch of whimsy while not being feeling unorganized. The large hexagon tiles are cut into the to give a cohesive feel with the rest of the hallway. The main space uses a transition overtop of the tiles for a clean threshold.
You can use this bakery’s idea for your kitchen or bar area. runs right up to the , framing the workspace with a soft, flowing curve in spite of the tiles’ sharp edges.
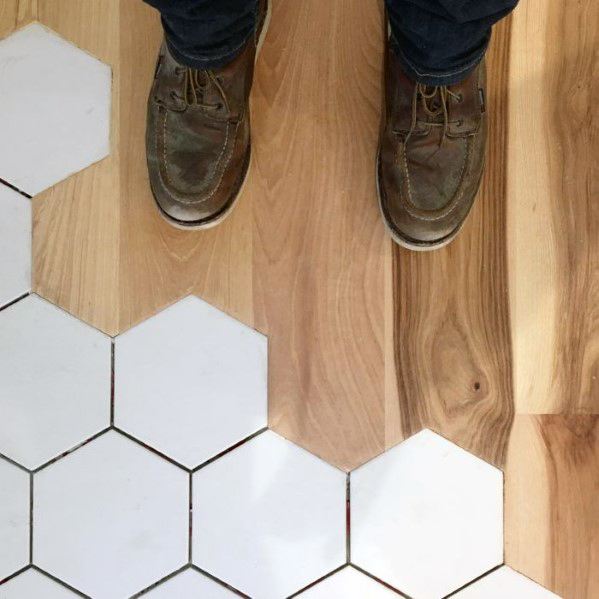
Rustic choices like the in the picture give a masculine and sophisticated look to a room. You’ll also benefit from the small imperfections in the . They’ll make it easier to inlay these tiles without worrying if you’ve slipped a little and made a minor mistake.

Blending large tiles into your existing may seem like a challenge. The truth is that complexity depends more on style than size. Don’t be too intimidated to try this to transition idea.
It helps to picture these cuts as 90-degree angles instead of combinations of 45-degree cuts. The layout will be easier to organize. It’s also easier to work with a square corner over a set of triangles. It seems semantic, but it will make a difference in your layout and final product.

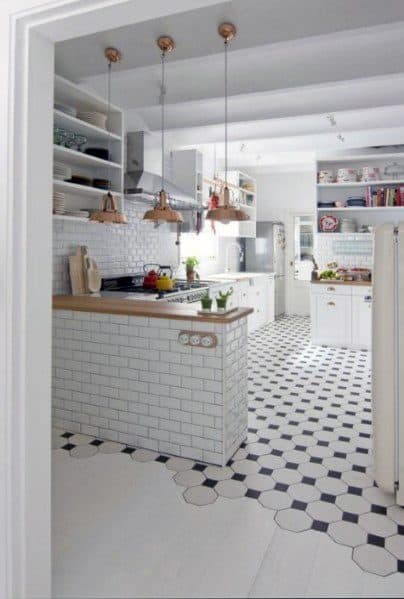
like this deserves all the attention it can gather. The intricate pattern is clearly intended to be a major focal point in this . You’ll want to choose a transition that doesn’t detract from the ‘s beauty.
The metal transition strip is a fine choice for complementing both materials while not making a big deal of itself. The brass finish blends in nicely with only a slightly reflective sheen. This will keep your visitor’s eyes on the intricate tilework, not a garish entryway molding.
FAQs
What kind of flooring looks good next to hardwood?
There are many different options for attractive flooring material combinations. Tile and hardwood are a classic pair, but they often meet with large, bulky wood trim at their seams. Consider a metal “Schluter” strip to dress up these two materials.
Are transition strips necessary?
This depends on the flooring material. Wood flooring can move and adjust according to the humidity, swelling width-wise when it absorbs moisture. Certain transition strips can absorb some of that expansion. While a transition strip may not be necessary, keep this in mind when tiling up to a hardwood floor.
How do you transition from hardwood floors to carpet?
Carpets are held down by tack strips and these often provide a serviceable transition between other sections of flooring. If you find this to be insufficient, there are wood transition strips available from hardwood dealers, as well as T-strips that can make the transition smoother and even.
How can you transition from LVL to hex tile?